<?xml version="1.0" encoding="utf-8"?>
<feed xmlns="http://www.w3.org/2005/Atom">
  <title>LiveForm Blog</title>
  
  <link href="/atom.xml" rel="self"/>
  
  <link href="http://blog.liveformhq.com/"/>
  <updated>2017-10-17T12:52:49.000Z</updated>
  <id>http://blog.liveformhq.com/</id>
  
  <author>
    <name>Khaja Minhajuddin</name>
    
  </author>
  
  <generator uri="http://hexo.io/">Hexo</generator>
  
  <entry>
    <title>How to customize outgoing email notifications</title>
    <link href="http://blog.liveformhq.com/2017/10/17/how-to-customize-outgoing-email-notifications/"/>
    <id>http://blog.liveformhq.com/2017/10/17/how-to-customize-outgoing-email-notifications/</id>
    <published>2017-10-17T17:27:16.000Z</published>
    <updated>2017-10-17T12:52:49.000Z</updated>
    
    <content type="html"><![CDATA[<p>LiveForm now has a shiny new feature! The ability to customize the email notifications
that you receive when a form is submitted. Let us look at an example of how to do this.</p>
<p>Let us setup a form from the beginning to see how to create custom outgoing email notifications.</p>
<ol>
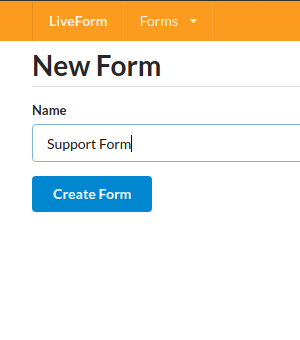
<li>Create a form<img src="/2017/10/17/how-to-customize-outgoing-email-notifications/customize-email-1.png" alt="Create a new Form" title="Create a new Form"></li>
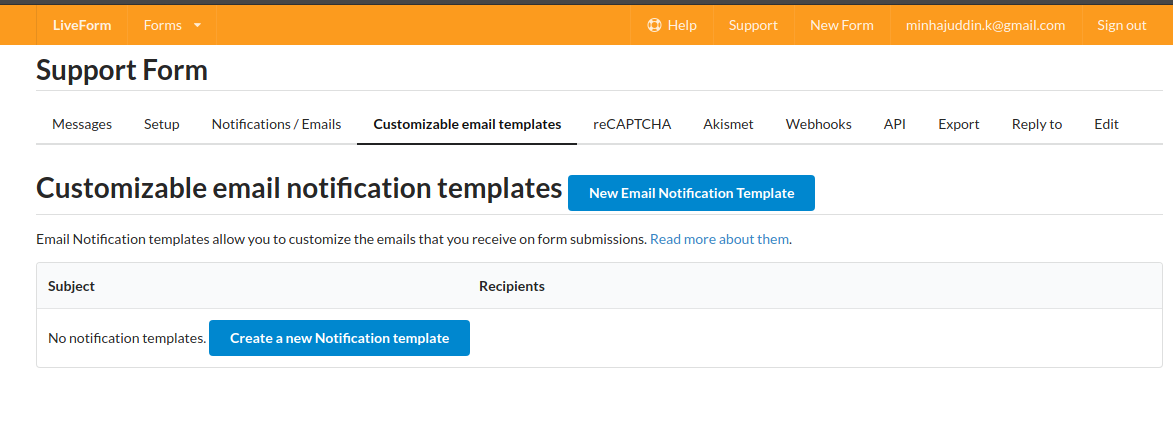
<li>Browse to the new “Customizable email templates” tab in the form.<img src="/2017/10/17/how-to-customize-outgoing-email-notifications/customize-email-2.png" alt="Customizable email templates tab" title="Customizable email templates tab"></li>
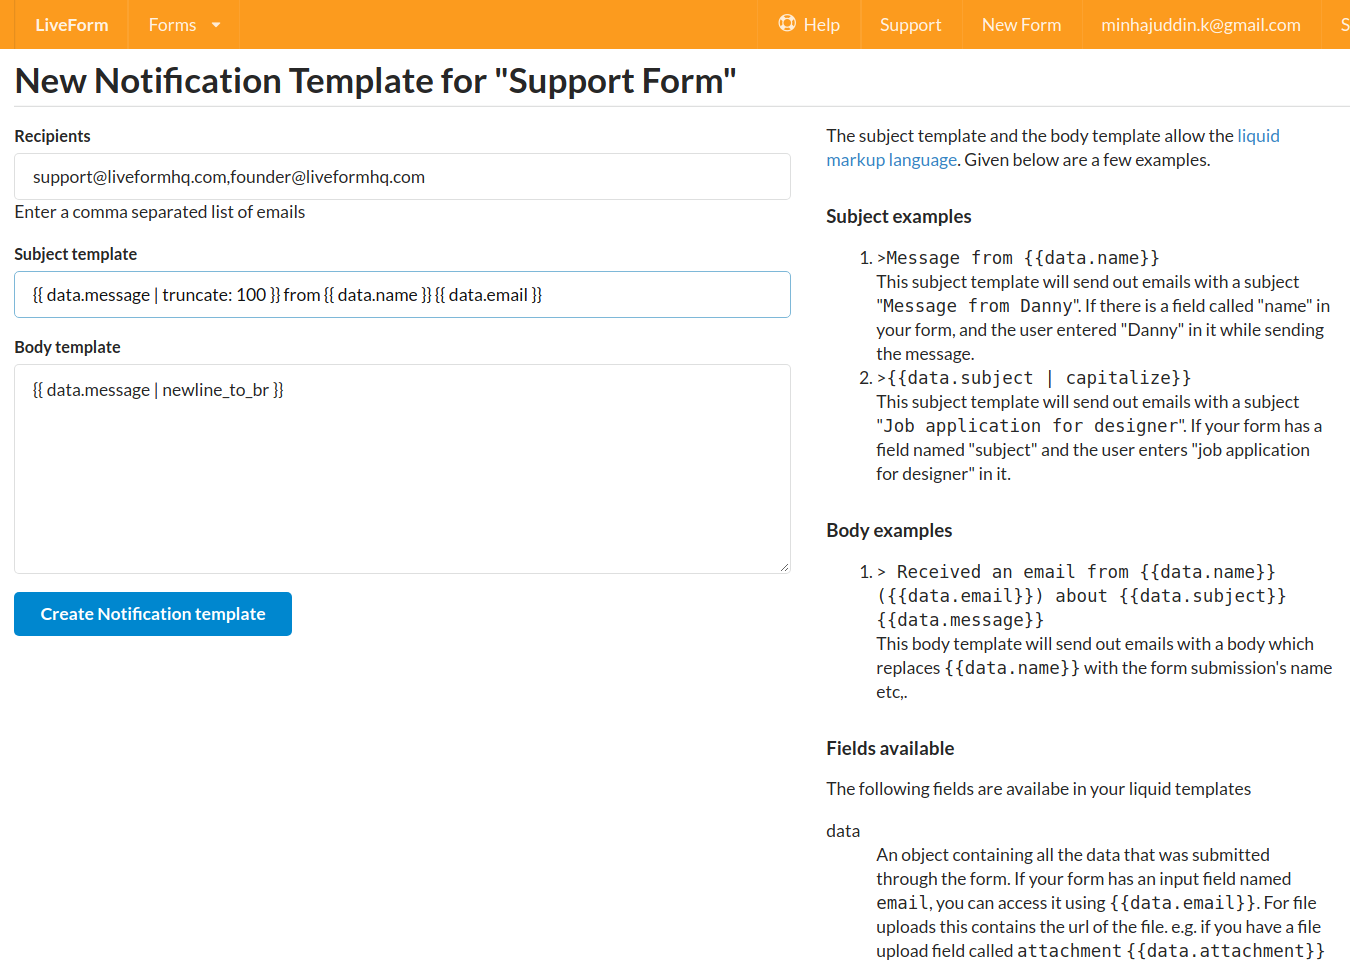
<li>Create a new email notification template<img src="/2017/10/17/how-to-customize-outgoing-email-notifications/customize-email-3.png" alt="Create a new notification template" title="Create a new notification template">
Let us look at all the fields on this page in detail. We have a recipients input field
which allows you to fill the recipients for this new notification. This can be filled
with multiple recipient emails. The <strong>Subject template</strong> as the name implies is the
template for the subject of the outgoing email. This template can have any text
plus data using the <a href="https://shopify.github.io/liquid/" target="_blank" rel="external">liquid markup language</a>.
In this example we are creating a subject line using the first 100 characters of a
field named <code>message</code> in our form. The <strong>Body template</strong> is actually simpler, it
just takes whatever was received in the <code>message</code> input field and adds <code>&lt;br&gt;</code> tags
instead of newlines.</li>
</ol>
<p>That is it! We have successfully created a new notification template.
Let us use our new test drive feature to test out our form.</p>
<p>Go to the form’s <strong>messages</strong> tab and click on the “Test your form” button.
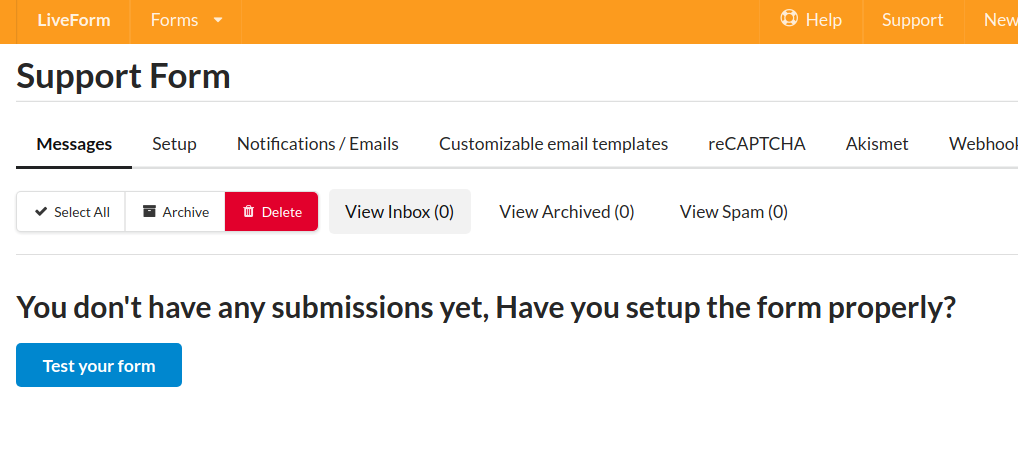
<img src="/2017/10/17/how-to-customize-outgoing-email-notifications/customize-email-4.png" alt="Messages tab" title="Messages tab"></p>
<p>This page allows you to test the new form we just created by sending it data
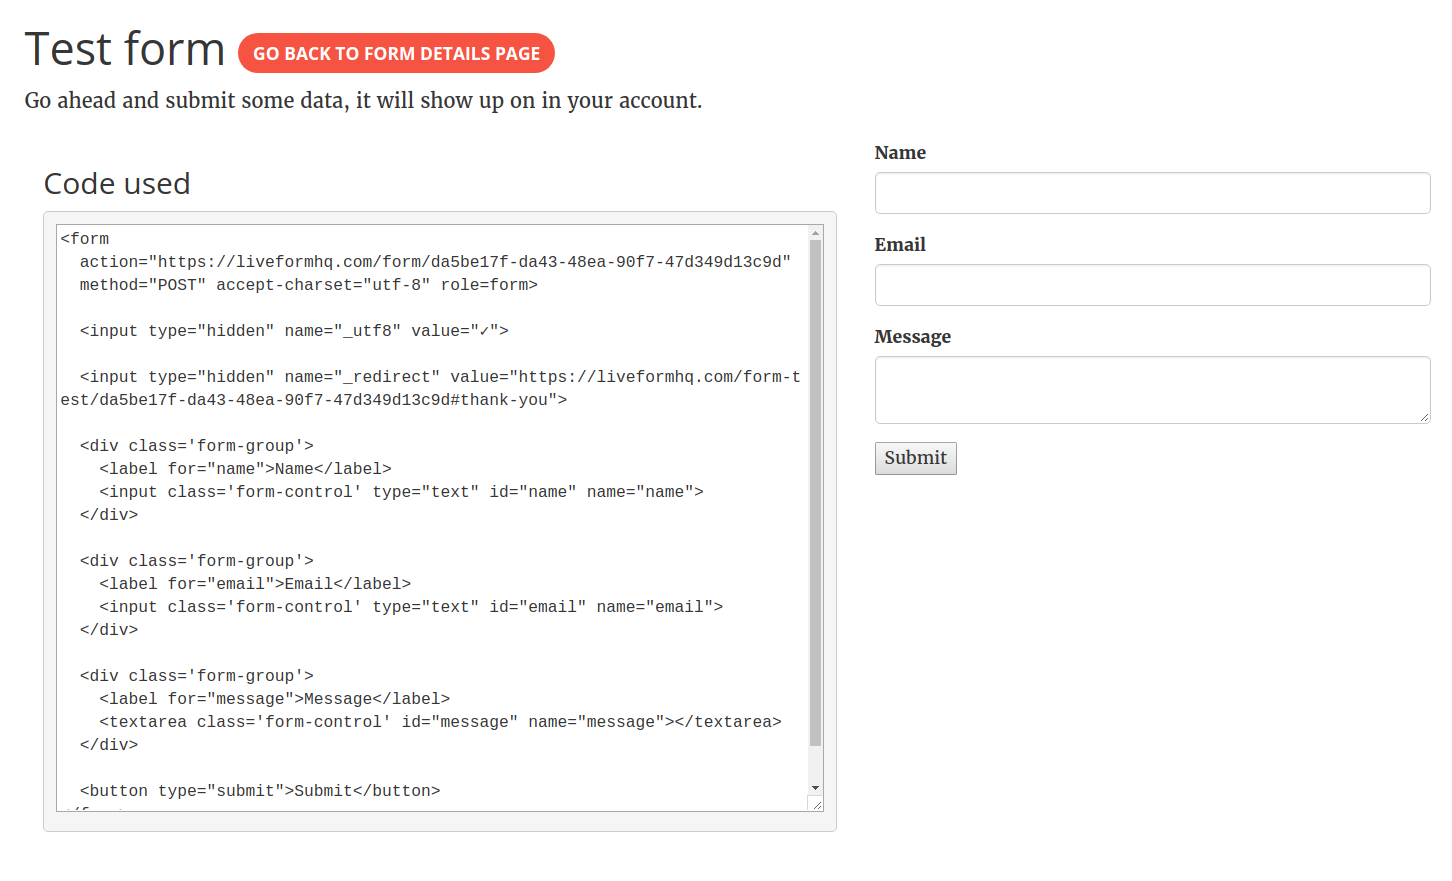
<img src="/2017/10/17/how-to-customize-outgoing-email-notifications/customize-email-5.png" alt="Test your form" title="Test your form"></p>
<p>Let us submit some test data into this form.
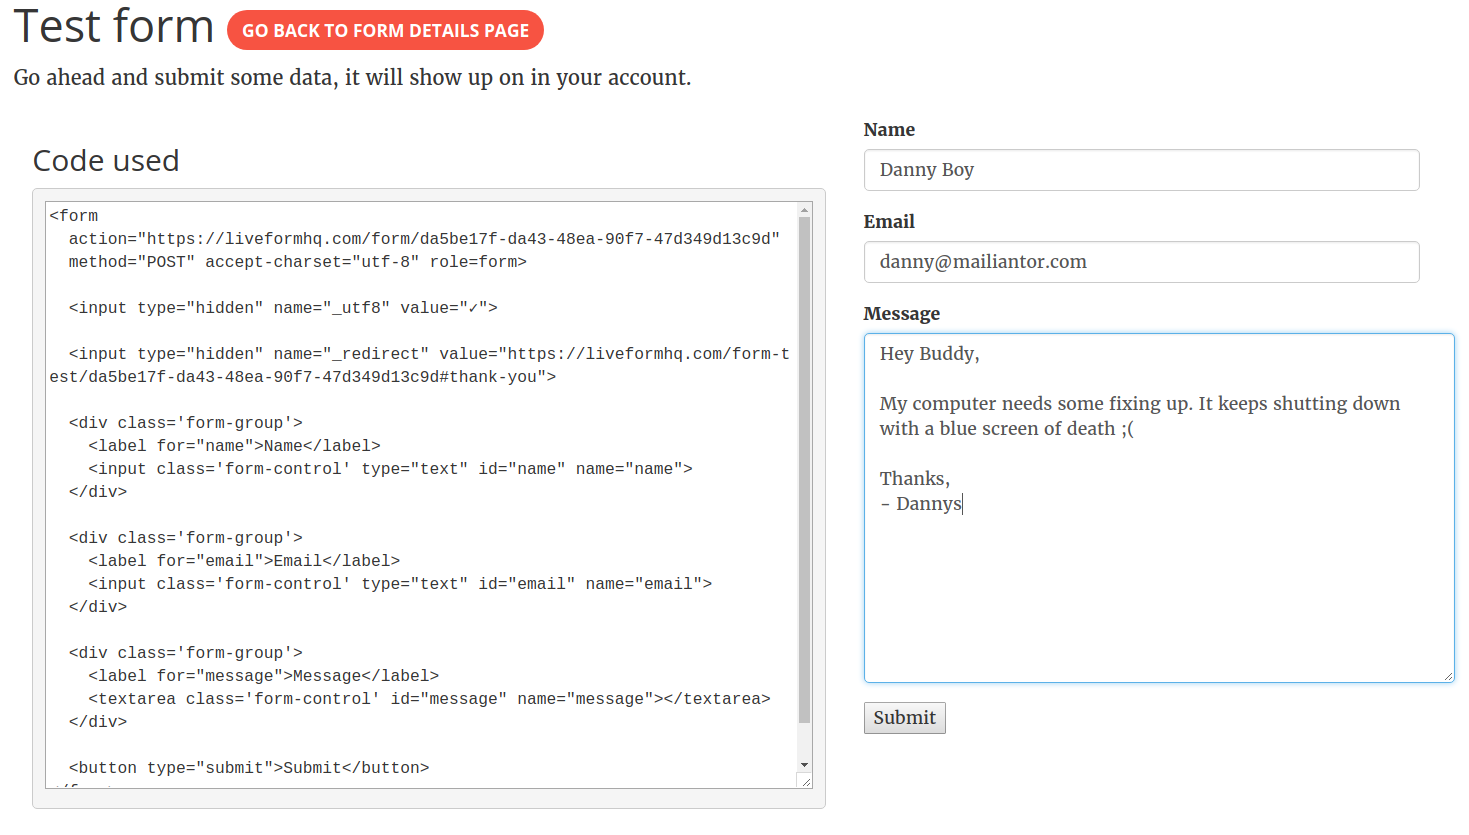
<img src="/2017/10/17/how-to-customize-outgoing-email-notifications/customize-email-6.png" alt="Filled up test form" title="Filled up test form"></p>
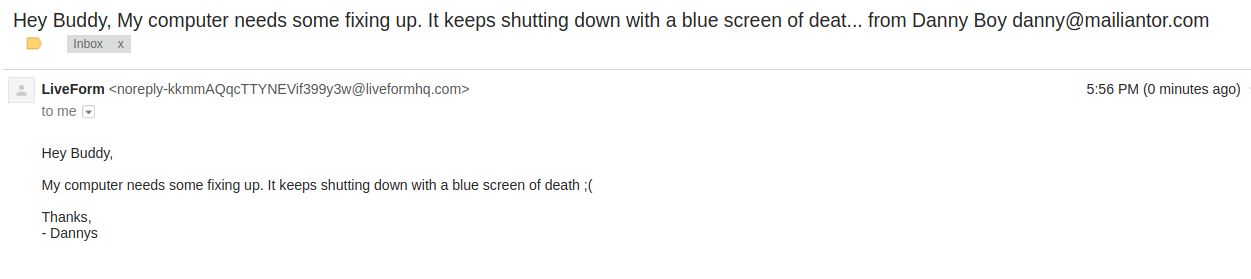
<p>This the email that I received. As you can see, the subject and body of the email have been created
based on our subject and body templates.
<img src="/2017/10/17/how-to-customize-outgoing-email-notifications/customize-email-7.png" alt="Email notification" title="Email notification"></p>
]]></content>
    
    <summary type="html">
    
      &lt;p&gt;LiveForm now has a shiny new feature! The ability to customize the email notifications
that you receive when a form is submitted. Let us 
    
    </summary>
    
    
      <category term="Email" scheme="http://blog.liveformhq.com/tags/email/"/>
    
      <category term="Notifications" scheme="http://blog.liveformhq.com/tags/notifications/"/>
    
      <category term="Customize" scheme="http://blog.liveformhq.com/tags/customize/"/>
    
      <category term="Template" scheme="http://blog.liveformhq.com/tags/template/"/>
    
      <category term="Liquid" scheme="http://blog.liveformhq.com/tags/liquid/"/>
    
  </entry>
  
  <entry>
    <title>How to setup a form from start to finish</title>
    <link href="http://blog.liveformhq.com/2017/08/18/how-to-setup-a-form-from-start-to-finish/"/>
    <id>http://blog.liveformhq.com/2017/08/18/how-to-setup-a-form-from-start-to-finish/</id>
    <published>2017-08-18T12:42:38.000Z</published>
    <updated>2017-10-17T12:52:49.000Z</updated>
    
    <content type="html"><![CDATA[<h2 id="STEP-1"><a href="#STEP-1" class="headerlink" title="STEP 1:"></a>STEP 1:</h2><ul>
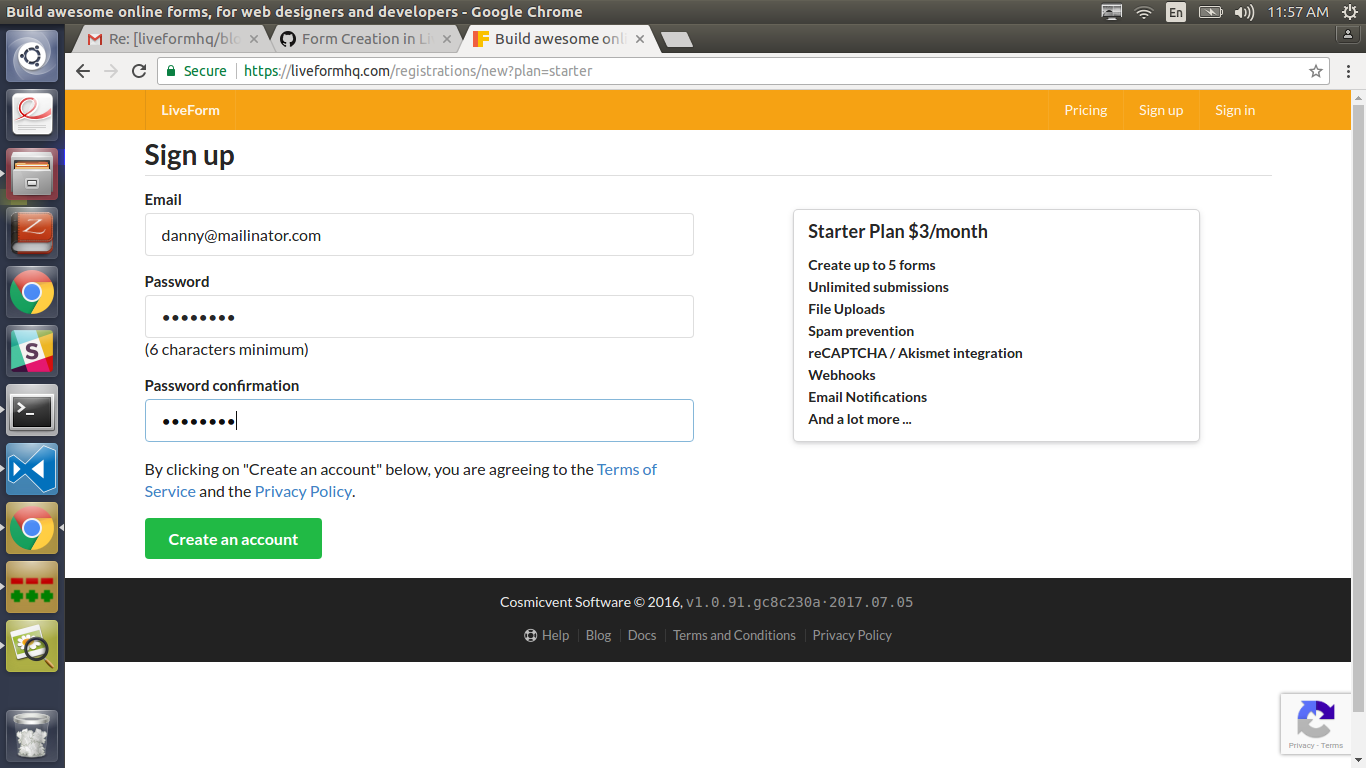
<li>Go to liveformhq.com website and click to the  signup button shown on the right side of the header in orange color.</li>
<li>There are three input elements, enter your email id <em>danny@mailinator.com</em> and  password respectively, as shown below.<img src="/2017/08/18/how-to-setup-a-form-from-start-to-finish/lf.png" alt="Liveform signup page" title="Liveform signup page">
</li>
</ul>
<hr>
<h2 id="STEP-2"><a href="#STEP-2" class="headerlink" title="STEP 2:"></a>STEP 2:</h2><ul>
<li>You will be confirmed by a message sent to your email id. </li>
<li>In this scenario <em>danny@mailinator.com</em> will be sent a mail with instructions.</li>
</ul>
<hr>
<h2 id="STEP-3"><a href="#STEP-3" class="headerlink" title="STEP 3:"></a>STEP 3:</h2><ul>
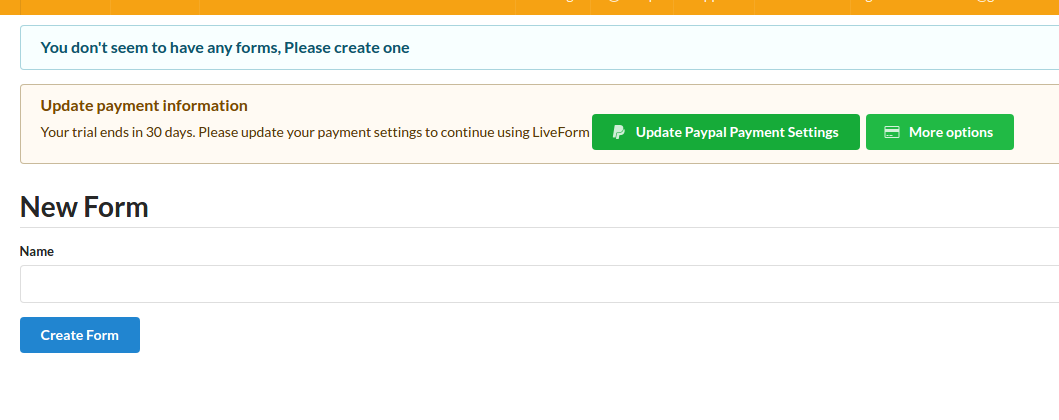
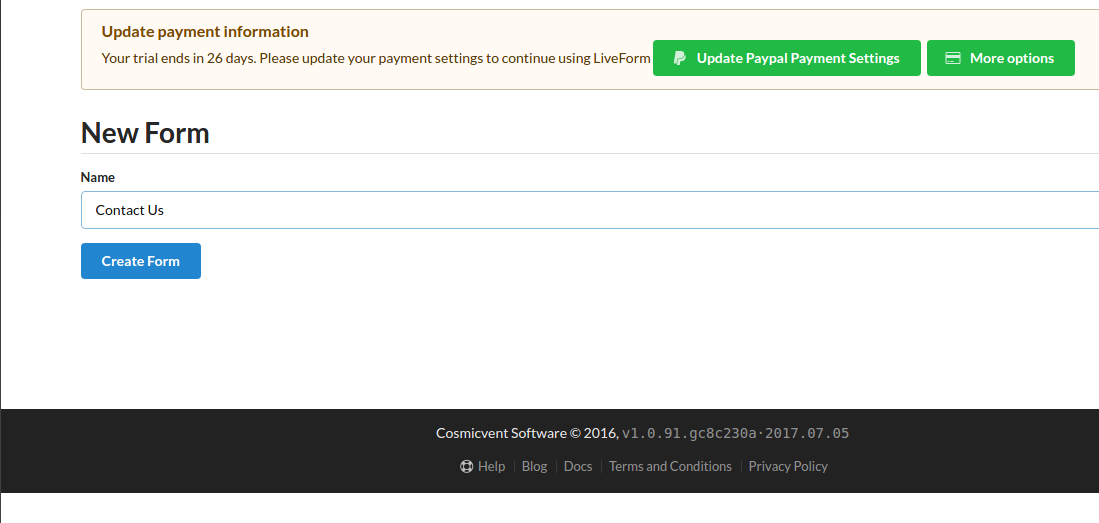
<li>A field for New Form  will be shown, here you can enter any form name that you want to create.</li>
</ul>
<img src="/2017/08/18/how-to-setup-a-form-from-start-to-finish/l2.png" alt="Liveform New Form" title="Liveform New Form">
<ul>
<li>For example <strong>Contact Us</strong> is form name that you want to create.</li>
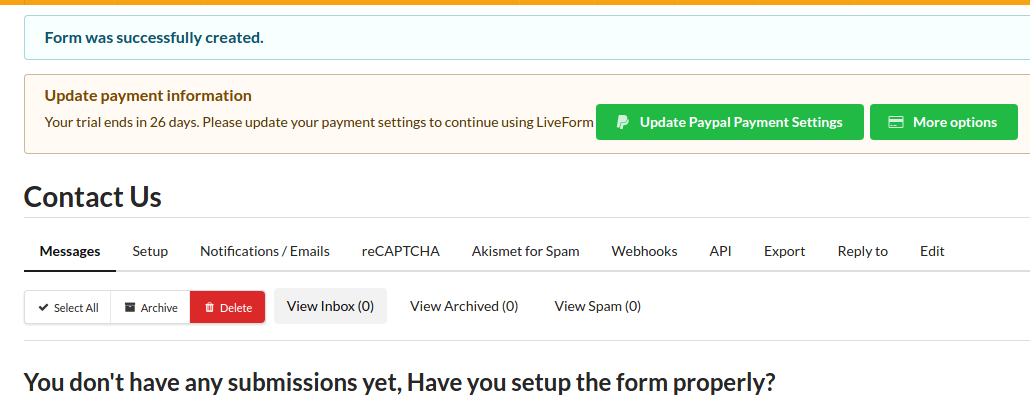
<li>Click Create Form button and a form will be created.</li>
</ul>
<img src="/2017/08/18/how-to-setup-a-form-from-start-to-finish/lf4.png" alt="Liveform Example form" title="Liveform Example form">
<hr>
<h2 id="STEP-4"><a href="#STEP-4" class="headerlink" title="STEP 4:"></a>STEP 4:</h2><ul>
<li>After the form is created a notification message is shown at the top.</li>
<li>You will be provided with a wide range of options from Messages to Edit…</li>
</ul>
<img src="/2017/08/18/how-to-setup-a-form-from-start-to-finish/lf5.png" alt="Liveform Notification" title="Liveform Notification">
<ul>
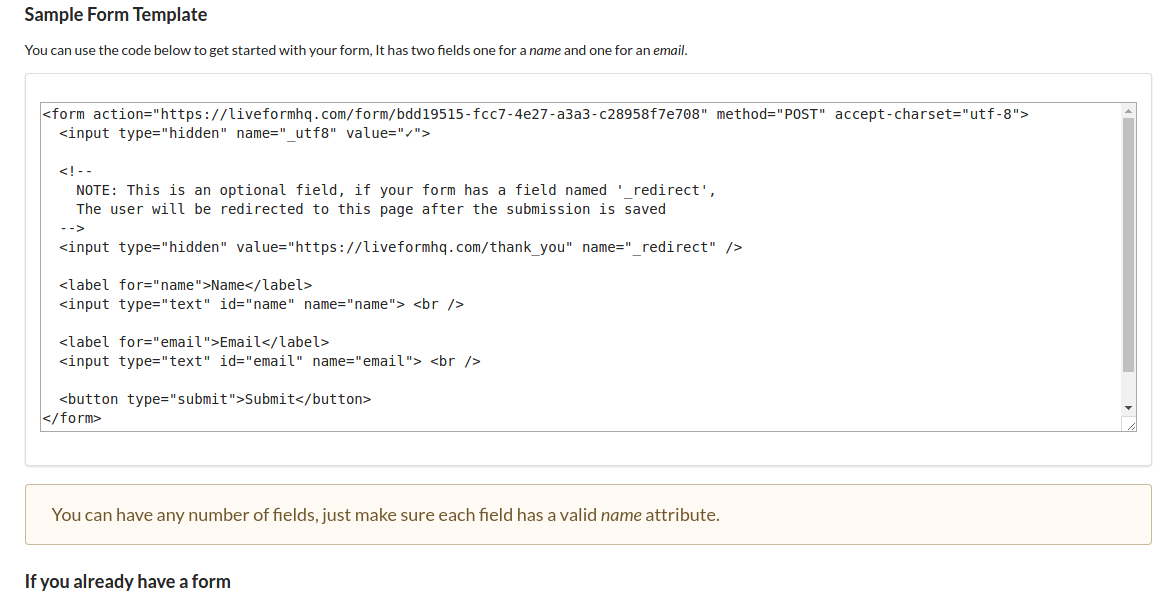
<li><p>For first time setup click the option <strong>Setup</strong> in the bar and you will be forwarded to a page with an example form as shown.</p>
<img src="/2017/08/18/how-to-setup-a-form-from-start-to-finish/l5.png" alt="Liveform default form" title="Liveform default form">
</li>
<li><p>If you already have a form then all you have to do is change the form’s action and method attributes.</p>
</li>
</ul>
<pre><code>&lt;form action=&quot;https://liveformhq.com/form/bdd19515-fcc7-4e27-a3a3-c28958f7e708&quot; method=&quot;POST&quot; accept-charset=&quot;utf-8&quot;&gt;
...form code which is already present or created one as per your requirements….
&lt;/form&gt;
</code></pre><ul>
<li>You can add any number….</li>
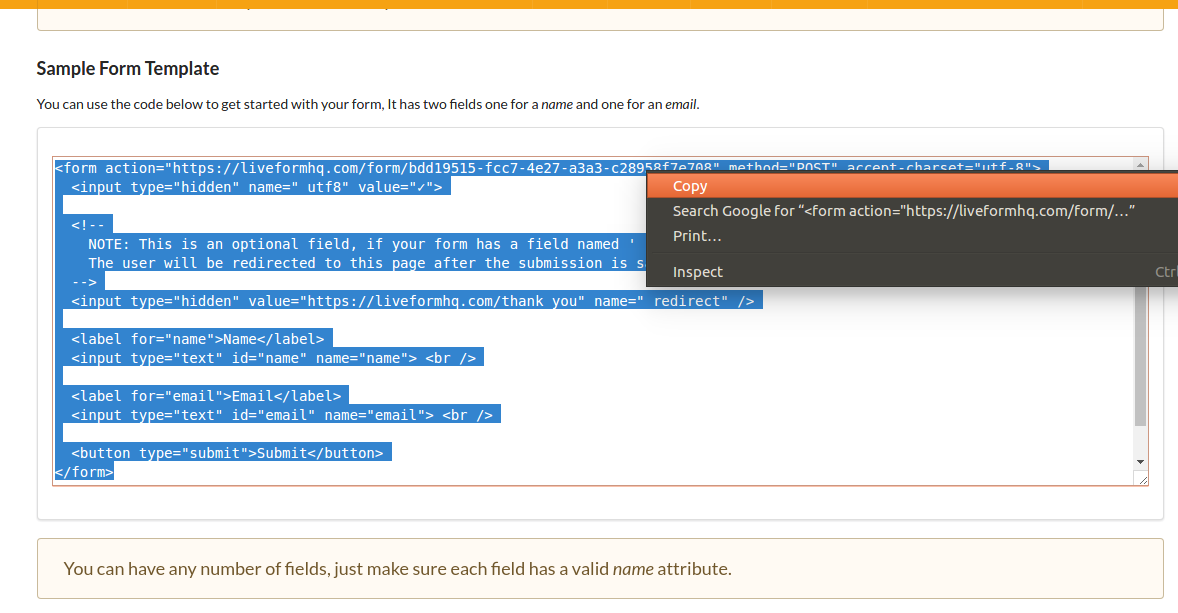
<li>One such form with <strong>name</strong> and <strong>email</strong> fields is created as an example.</li>
<li>Copy the code and paste in the file in your computer.</li>
</ul>
<img src="/2017/08/18/how-to-setup-a-form-from-start-to-finish/l6.png" alt="Liveform copying form code" title="Liveform copying form code">
<hr>
<h2 id="STEP-5"><a href="#STEP-5" class="headerlink" title="STEP 5:"></a>STEP 5:</h2><ul>
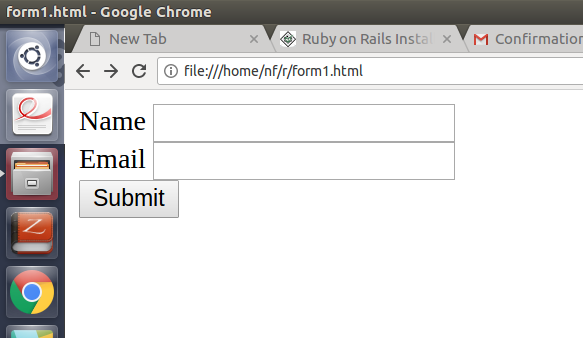
<li>Browse to the file path in your favourite browser and submit the form as shown.</li>
</ul>
<img src="/2017/08/18/how-to-setup-a-form-from-start-to-finish/l7.png" alt="Liveform browse to file path" title="Liveform browse to file path">
<ul>
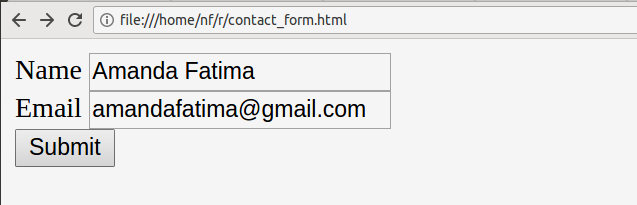
<li>Enter the fields as in our example the name of the person to contact is  <em>Amanda Fatima</em> and the email id is <em>amandafatima@gmail.com</em> .</li>
<li>Click submit button and a message will be sent to you.</li>
<li>Any one can browse and thereby enter the information and create messages. </li>
</ul>
<img src="/2017/08/18/how-to-setup-a-form-from-start-to-finish/lf6.png" alt="Liveform submitting a form" title="Liveform submitting a form">
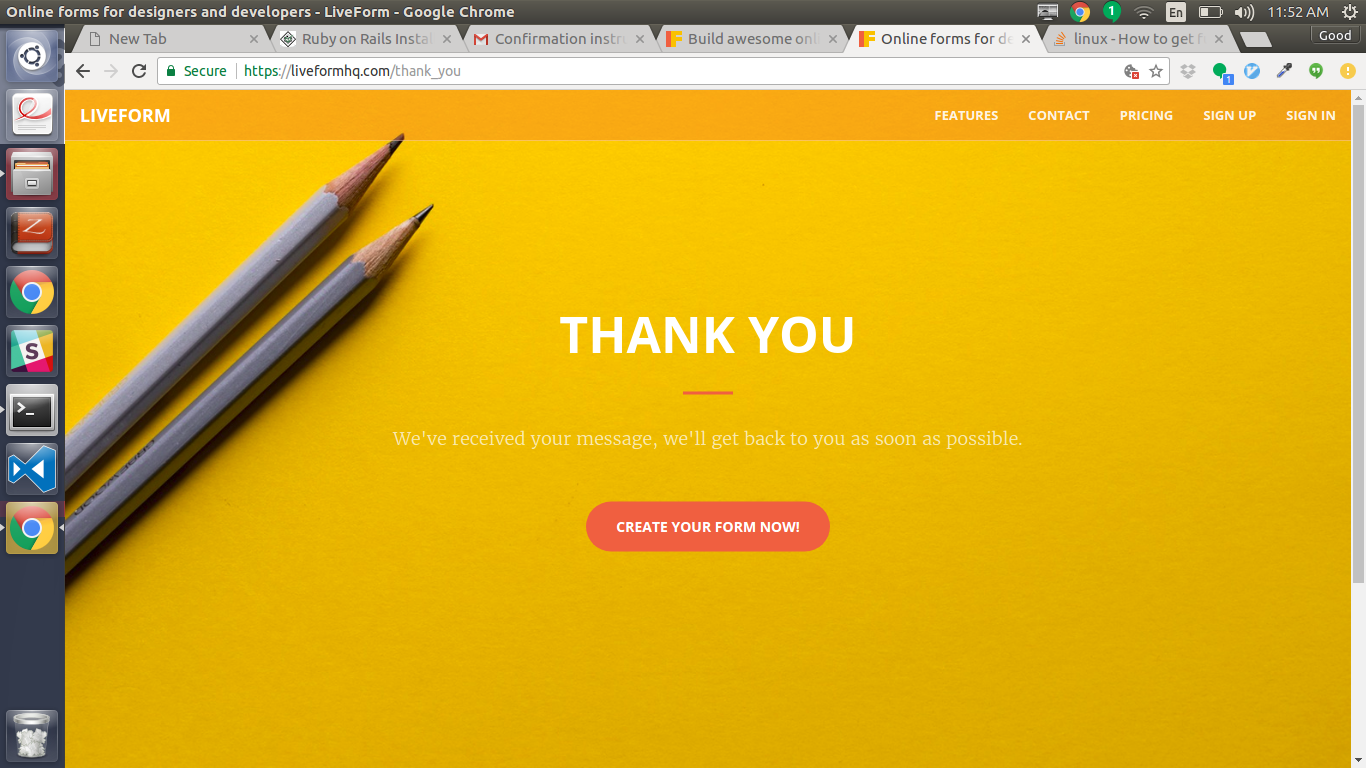
<p>*You will be redirected to a “Thank You” page after submitting the form.</p>
<img src="/2017/08/18/how-to-setup-a-form-from-start-to-finish/l9.png" alt="Liveform Thank You Page" title="Liveform Thank You Page">
<ul>
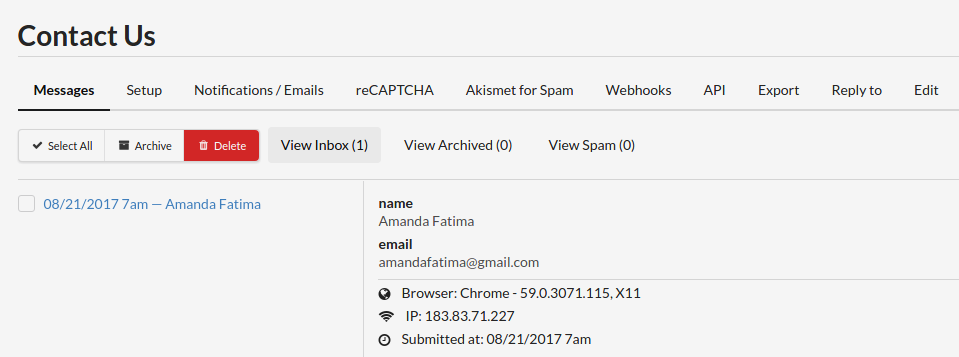
<li>When you sign in to your account at liveformhq.com a series of all the messages will be shown in the Messages tab of your particular form</li>
</ul>
<img src="/2017/08/18/how-to-setup-a-form-from-start-to-finish/lf7.png" alt="Messages received" title="Messages received">
<ul>
<li>That’s it! You have created a form and anyone can post it so that you can check it!</li>
</ul>
]]></content>
    
    <summary type="html">
    
      &lt;h2 id=&quot;STEP-1&quot;&gt;&lt;a href=&quot;#STEP-1&quot; class=&quot;headerlink&quot; title=&quot;STEP 1:&quot;&gt;&lt;/a&gt;STEP 1:&lt;/h2&gt;&lt;ul&gt;
&lt;li&gt;Go to liveformhq.com website and click to the 
    
    </summary>
    
    
  </entry>
  
  <entry>
    <title>How to use the new Reply To feature to seamlessly communicate with your users</title>
    <link href="http://blog.liveformhq.com/2017/03/04/how-to-use-the-new-reply-to-feature-to-seamlessly-communicate-with-your-users/"/>
    <id>http://blog.liveformhq.com/2017/03/04/how-to-use-the-new-reply-to-feature-to-seamlessly-communicate-with-your-users/</id>
    <published>2017-03-04T17:52:14.000Z</published>
    <updated>2017-10-17T12:52:49.000Z</updated>
    
    <content type="html"><![CDATA[<p>We have released a new feature which allows you to seamlessly communicate with your users. We love dogfooding and use LiveForm for our contact forms.
We get a lot of messages and it becomes tedious to create a new email and copy the recipient address to a new email and then respond.
We have been using this feature for a while and are making it public now. To use this feature just do the following:</p>
<ol>
<li>Add an email field to your contact form, you may already have this field. Copy the <code>name</code> of this input field from your contact form.</li>
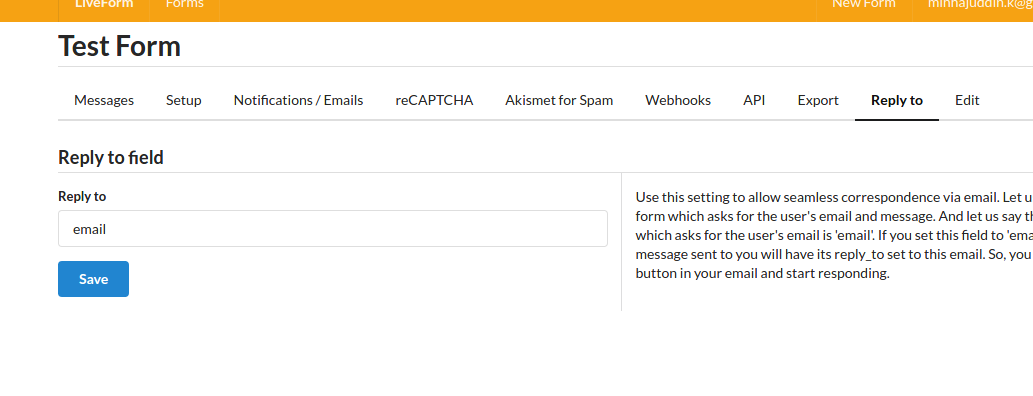
<li>Go to the ‘Repy To’ tab for your form and set the <code>reply_to</code> value to the name from step (1)<img src="/2017/03/04/how-to-use-the-new-reply-to-feature-to-seamlessly-communicate-with-your-users/reply_to.png" alt="Reply To tab for your form" title="Reply To tab for your form">
</li>
</ol>
<p>That is it, now when you get a notification email for your contact form. Just hit ‘Reply’ and continue the conversation.</p>
]]></content>
    
    <summary type="html">
    
      &lt;p&gt;We have released a new feature which allows you to seamlessly communicate with your users. We love dogfooding and use LiveForm for our co
    
    </summary>
    
    
      <category term="Reply to" scheme="http://blog.liveformhq.com/tags/reply-to/"/>
    
      <category term="Feature" scheme="http://blog.liveformhq.com/tags/feature/"/>
    
  </entry>
  
  <entry>
    <title>How to build an ajax form using LiveForm and jQuery</title>
    <link href="http://blog.liveformhq.com/2017/01/01/how-to-build-an-ajax-form-using-liveform-and-jquery/"/>
    <id>http://blog.liveformhq.com/2017/01/01/how-to-build-an-ajax-form-using-liveform-and-jquery/</id>
    <published>2017-01-01T23:14:43.000Z</published>
    <updated>2017-10-17T12:52:49.000Z</updated>
    
    <content type="html"><![CDATA[<p>In this blog post we’ll see how we can use LiveForm and jQuery to build an Ajax form.</p>
<p>Take this form for example, it has a name, email and a message field.</p>
<figure class="highlight html"><table><tr><td class="gutter"><pre><div class="line">1</div><div class="line">2</div><div class="line">3</div><div class="line">4</div><div class="line">5</div><div class="line">6</div><div class="line">7</div><div class="line">8</div><div class="line">9</div></pre></td><td class="code"><pre><div class="line"><span class="tag">&lt;<span class="name">form</span> <span class="attr">id</span>=<span class="string">"contact-form"</span> <span class="attr">method</span>=<span class="string">"post"</span> <span class="attr">action</span>=<span class="string">"https://liveformhq.com/form/27fb4351-d2f7-45d3-96ac-8dae0eda2d26"</span>&gt;</span></div><div class="line">    <span class="tag">&lt;<span class="name">input</span> <span class="attr">id</span>=<span class="string">"name"</span> <span class="attr">name</span>=<span class="string">"name"</span> <span class="attr">type</span>=<span class="string">"text"</span> /&gt;</span></div><div class="line">    <span class="tag">&lt;<span class="name">br</span> /&gt;</span></div><div class="line">    <span class="tag">&lt;<span class="name">input</span> <span class="attr">id</span>=<span class="string">"email"</span> <span class="attr">name</span>=<span class="string">"email"</span> <span class="attr">type</span>=<span class="string">"email"</span> /&gt;</span></div><div class="line">    <span class="tag">&lt;<span class="name">br</span> /&gt;</span></div><div class="line">    <span class="tag">&lt;<span class="name">textarea</span> <span class="attr">id</span>=<span class="string">"message"</span> <span class="attr">name</span>=<span class="string">"message"</span> <span class="attr">rows</span>=<span class="string">8</span> <span class="attr">cols</span>=<span class="string">40</span>&gt;</span><span class="tag">&lt;/<span class="name">textarea</span>&gt;</span></div><div class="line">    <span class="tag">&lt;<span class="name">br</span> /&gt;</span></div><div class="line">    <span class="tag">&lt;<span class="name">button</span> <span class="attr">id</span>=<span class="string">"submit"</span> <span class="attr">type</span>=<span class="string">"submit"</span>&gt;</span>Send Message<span class="tag">&lt;/<span class="name">button</span>&gt;</span></div><div class="line"><span class="tag">&lt;/<span class="name">form</span>&gt;</span></div></pre></td></tr></table></figure>
<p>By default this form will make a full page post request to the server. We can use jQuery to
make it do the submission via AJAX. All we need to do, is include jQuery (a CDN version can be found at <a href="https://code.jquery.com/" target="_blank" rel="external">https://code.jquery.com/</a>)
And intercept the form submission and make an AJAX post instead of the default. Here is some code which does that:</p>
<figure class="highlight javascript"><table><tr><td class="gutter"><pre><div class="line">1</div><div class="line">2</div><div class="line">3</div><div class="line">4</div><div class="line">5</div><div class="line">6</div><div class="line">7</div><div class="line">8</div><div class="line">9</div><div class="line">10</div><div class="line">11</div><div class="line">12</div><div class="line">13</div><div class="line">14</div><div class="line">15</div><div class="line">16</div><div class="line">17</div><div class="line">18</div><div class="line">19</div><div class="line">20</div><div class="line">21</div><div class="line">22</div><div class="line">23</div></pre></td><td class="code"><pre><div class="line">$(<span class="function"><span class="keyword">function</span>(<span class="params"></span>)</span>&#123;</div><div class="line">  <span class="comment">// intercept the form submission</span></div><div class="line">  $(<span class="string">"#contact-form"</span>).on(<span class="string">"submit"</span>, <span class="function"><span class="keyword">function</span>(<span class="params">e</span>) </span>&#123;</div><div class="line">      e.preventDefault(); <span class="comment">// stop the form from being submitted</span></div><div class="line"></div><div class="line">      <span class="comment">// make an ajax POST request to the form's action</span></div><div class="line">      $.ajax(&#123;</div><div class="line">          <span class="attr">type</span>: <span class="string">"POST"</span>,</div><div class="line">          <span class="attr">url</span>: $(<span class="keyword">this</span>).attr(<span class="string">"action"</span>),      <span class="comment">// use the form's action attribute as the endpoint</span></div><div class="line">          data: $(<span class="keyword">this</span>).serialize(),        <span class="comment">// use the data from the form</span></div><div class="line">          headers:</div><div class="line">          &#123;</div><div class="line">              <span class="string">"Accept"</span>: <span class="string">"application/json"</span>  <span class="comment">// this makes the server send you a JSON response</span></div><div class="line">          &#125;,</div><div class="line">          <span class="attr">success</span>: <span class="function"><span class="keyword">function</span>(<span class="params">response</span>)       // <span class="title">handle</span> <span class="title">the</span> <span class="title">successful</span> <span class="title">submission</span> <span class="title">of</span> <span class="title">your</span> <span class="title">POST</span></span></div><div class="line">          &#123;</div><div class="line">              <span class="built_in">console</span>.log(response);        <span class="comment">// response contains the form submission that was just made</span></div><div class="line">              alert(<span class="string">"Thank you for your submission, we'll get back to you soon :)"</span>);</div><div class="line">              $(<span class="string">"#contact-form"</span>)[<span class="number">0</span>].reset();<span class="comment">// reset the form</span></div><div class="line">          &#125;,</div><div class="line">      &#125;);</div><div class="line">  &#125;);</div><div class="line">&#125;)</div></pre></td></tr></table></figure>
<p>You can check out a full working demo at <a href="http://demos.liveformhq.com/ajax-form/" target="_blank" rel="external">http://demos.liveformhq.com/ajax-form/</a></p>
]]></content>
    
    <summary type="html">
    
      &lt;p&gt;In this blog post we’ll see how we can use LiveForm and jQuery to build an Ajax form.&lt;/p&gt;
&lt;p&gt;Take this form for example, it has a name, e
    
    </summary>
    
    
      <category term="Ajax Form" scheme="http://blog.liveformhq.com/tags/ajax-form/"/>
    
      <category term="jQuery" scheme="http://blog.liveformhq.com/tags/jquery/"/>
    
      <category term="Ajax" scheme="http://blog.liveformhq.com/tags/ajax/"/>
    
  </entry>
  
  <entry>
    <title>LiveForm now has the ability to export your form&#39;s messages to Excel/CSV</title>
    <link href="http://blog.liveformhq.com/2016/12/25/liveform-now-has-the-ability-to-export-your-form-s-messages-to-excel-csv/"/>
    <id>http://blog.liveformhq.com/2016/12/25/liveform-now-has-the-ability-to-export-your-form-s-messages-to-excel-csv/</id>
    <published>2016-12-25T19:19:45.000Z</published>
    <updated>2017-10-17T12:52:49.000Z</updated>
    
    <content type="html"><![CDATA[<p>Many of you have asked for a feature which allows downloading of messages to Excel.
We now have that feature :)</p>
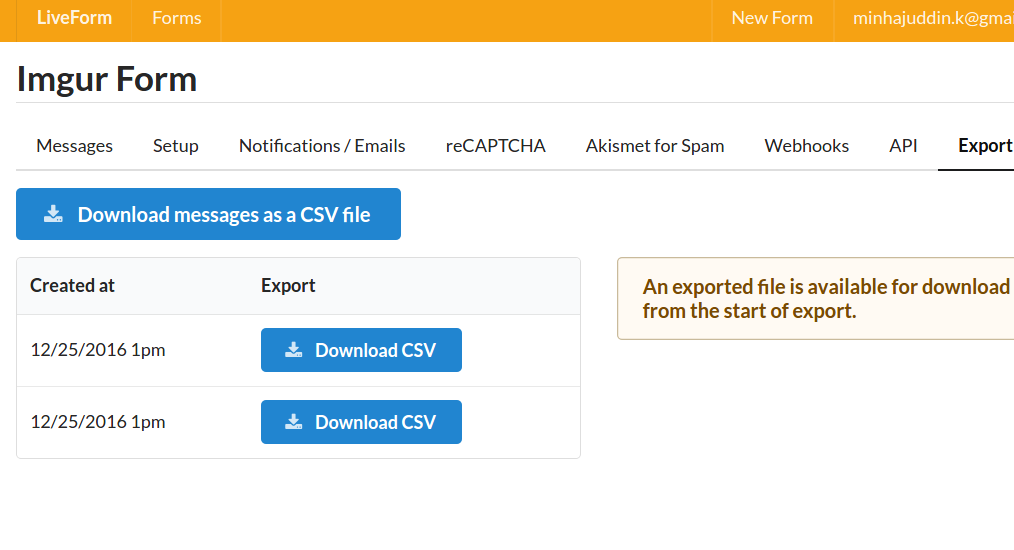
<p>All you need to do is, go to the Exports page and click on the Download button.
This will create a new export which can be downloaded by clicking on the <em>**Download</em> button.</p>
<p>Here is a screenshot:</p>
<img src="/2016/12/25/liveform-now-has-the-ability-to-export-your-form-s-messages-to-excel-csv/liveform-export.png" alt="LiveForm Export" title="LiveForm Export">
<p>If you have any more <a href="https://liveformhq.com/#Contact" target="_blank" rel="external">suggestions feedback, we’d love hear them</a>.</p>
]]></content>
    
    <summary type="html">
    
      &lt;p&gt;Many of you have asked for a feature which allows downloading of messages to Excel.
We now have that feature :)&lt;/p&gt;
&lt;p&gt;All you need to do
    
    </summary>
    
    
      <category term="Export" scheme="http://blog.liveformhq.com/tags/export/"/>
    
      <category term="Excel" scheme="http://blog.liveformhq.com/tags/excel/"/>
    
      <category term="CSV" scheme="http://blog.liveformhq.com/tags/csv/"/>
    
      <category term="Download" scheme="http://blog.liveformhq.com/tags/download/"/>
    
  </entry>
  
  <entry>
    <title>Use Akismet to prevent spam on your blogs and sites</title>
    <link href="http://blog.liveformhq.com/2016/12/19/use-akismet-to-prevent-spam-on-your-blogs-and-sites/"/>
    <id>http://blog.liveformhq.com/2016/12/19/use-akismet-to-prevent-spam-on-your-blogs-and-sites/</id>
    <published>2016-12-19T23:30:46.000Z</published>
    <updated>2017-10-17T12:52:49.000Z</updated>
    
    <content type="html"><![CDATA[<p>You can wire up LiveForm to use Akismet to prevent spam on your blogs and sites easily.</p>
<ol>
<li>Get an Akismet key by signing up on <a href="https://akismet.com/" target="_blank" rel="external">Akismet</a>.</li>
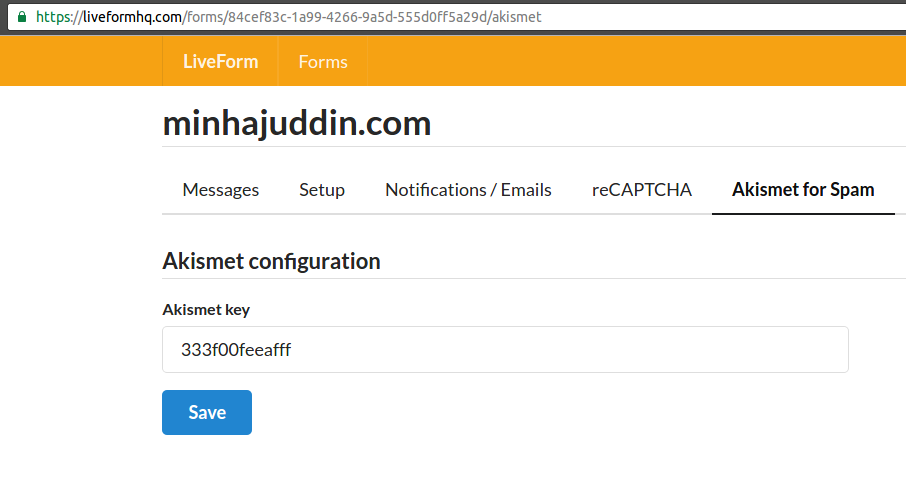
<li>Once, you have a key set it up on LiveForm by browsing to the form’s Akismet tab and pasting your Akismet key.<img src="/2016/12/19/use-akismet-to-prevent-spam-on-your-blogs-and-sites/akismet_setting.png" alt="Akismet Key Setting" title="Akismet Key Setting">
</li>
</ol>
<p>That’s all folks. Once you do this, all your form submissions will be checked for spam using Akismet! </p>
]]></content>
    
    <summary type="html">
    
      &lt;p&gt;You can wire up LiveForm to use Akismet to prevent spam on your blogs and sites easily.&lt;/p&gt;
&lt;ol&gt;
&lt;li&gt;Get an Akismet key by signing up on 
    
    </summary>
    
    
      <category term="Akismet" scheme="http://blog.liveformhq.com/tags/akismet/"/>
    
      <category term="Spam" scheme="http://blog.liveformhq.com/tags/spam/"/>
    
  </entry>
  
  <entry>
    <title>Using nginx to mask the liveform url on your contact forms</title>
    <link href="http://blog.liveformhq.com/2016/12/18/using-nginx-to-mask-the-liveform-url-on-your-contact-forms/"/>
    <id>http://blog.liveformhq.com/2016/12/18/using-nginx-to-mask-the-liveform-url-on-your-contact-forms/</id>
    <published>2016-12-18T00:26:54.000Z</published>
    <updated>2017-10-17T12:52:49.000Z</updated>
    
    <content type="html"><![CDATA[<p>You can use Nginx to mask the form id of your LiveForm url. Here is a configuration which lets you do that.</p>
<figure class="highlight plain"><table><tr><td class="gutter"><pre><div class="line">1</div><div class="line">2</div><div class="line">3</div><div class="line">4</div><div class="line">5</div><div class="line">6</div><div class="line">7</div><div class="line">8</div><div class="line">9</div><div class="line">10</div><div class="line">11</div><div class="line">12</div><div class="line">13</div></pre></td><td class="code"><pre><div class="line">server &#123;</div><div class="line">  server_name awesome.com;</div><div class="line">  # ....</div><div class="line"></div><div class="line">  location /form &#123;</div><div class="line">    proxy_pass https://liveformhq.com/form/369c5f72-7940-4d20-b3c7-8a963fc49a15;</div><div class="line"></div><div class="line">    proxy_set_header  X-Real-IP        $remote_addr;</div><div class="line">    proxy_set_header  X-Forwarded-For  $proxy_add_x_forwarded_for;</div><div class="line">    proxy_set_header  Host             $http_host;</div><div class="line">    proxy_set_header X_FORWARDED_PROTO $scheme;</div><div class="line">  &#125;</div><div class="line">&#125;</div></pre></td></tr></table></figure>
<p>Now you can just use the <code>/form</code> endpoint in your html. e.g.</p>
<figure class="highlight html"><table><tr><td class="gutter"><pre><div class="line">1</div><div class="line">2</div></pre></td><td class="code"><pre><div class="line"><span class="tag">&lt;<span class="name">form</span> <span class="attr">method</span>=<span class="string">'post'</span> <span class="attr">action</span>=<span class="string">'/form'</span>&gt;</span></div><div class="line"><span class="tag">&lt;/<span class="name">form</span>&gt;</span></div></pre></td></tr></table></figure>
]]></content>
    
    <summary type="html">
    
      &lt;p&gt;You can use Nginx to mask the form id of your LiveForm url. Here is a configuration which lets you do that.&lt;/p&gt;
&lt;figure class=&quot;highlight 
    
    </summary>
    
    
      <category term="Nginx" scheme="http://blog.liveformhq.com/tags/nginx/"/>
    
      <category term="Mask" scheme="http://blog.liveformhq.com/tags/mask/"/>
    
  </entry>
  
  <entry>
    <title>Creating an Imgur clone using Github Pages and Liveform</title>
    <link href="http://blog.liveformhq.com/2016/11/27/creating-an-imgur-clone-using-github-pages-and-liveform/"/>
    <id>http://blog.liveformhq.com/2016/11/27/creating-an-imgur-clone-using-github-pages-and-liveform/</id>
    <published>2016-11-27T18:24:54.000Z</published>
    <updated>2017-10-17T12:52:49.000Z</updated>
    
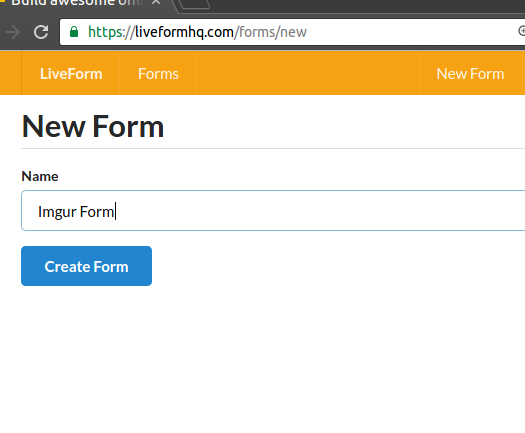
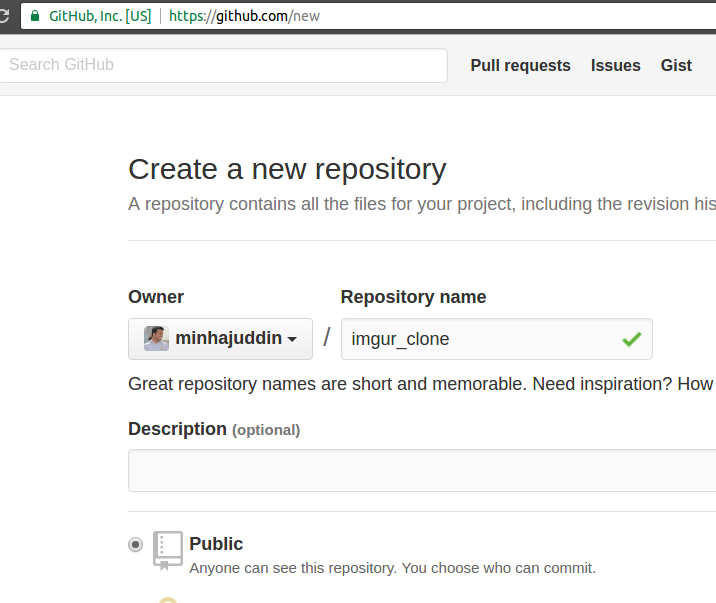
    <content type="html"><![CDATA[<p><a href="http://blog.liveformhq.com/2016/11/26/file-uploads-for-your-forms/">Yesterday, we released the ability to upload files using Liveform</a> Today, we released readonly API access to messages. These two features allow us to build simple and powerful tools with minimal work. In this blog post, we’ll build a clone of <a href="http://imgur.com/" target="_blank" rel="external">Imgur</a>, the popular image hosting website. We’ll do this using Github Pages and Liveform. Let’s get started!</p>
<ol>
<li>Create a new form called <em>Imgur Form</em> in Liveform.<img src="/2016/11/27/creating-an-imgur-clone-using-github-pages-and-liveform/imgur1.png" alt="Create Imgur Form" title="Create Imgur Form"></li>
<li>Create a new repository in Github, let’s name it <em>imgur_clone</em><img src="/2016/11/27/creating-an-imgur-clone-using-github-pages-and-liveform/imgur2.png" alt="Create Github repository" title="Create Github repository"></li>
<li>Now let’s create a branch called <em>gh-pages</em> on Github. This will hold our final website.</li>
<li><p>Let us now create our home page <code>index.html</code> at the root of our repository. This is a simple stub page, with 2 links and a placeholder for our images</p>
<figure class="highlight html"><table><tr><td class="gutter"><pre><div class="line">1</div><div class="line">2</div><div class="line">3</div><div class="line">4</div><div class="line">5</div><div class="line">6</div><div class="line">7</div><div class="line">8</div></pre></td><td class="code"><pre><div class="line"><span class="meta">&lt;!doctype html&gt;</span></div><div class="line"></div><div class="line"><span class="tag">&lt;<span class="name">a</span> <span class="attr">href</span>=<span class="string">'/'</span>&gt;</span>Imgur<span class="tag">&lt;/<span class="name">a</span>&gt;</span> | <span class="tag">&lt;<span class="name">a</span> <span class="attr">href</span>=<span class="string">'/new.html'</span>&gt;</span>New Upload<span class="tag">&lt;/<span class="name">a</span>&gt;</span></div><div class="line"></div><div class="line"><span class="tag">&lt;<span class="name">br</span> /&gt;</span></div><div class="line"></div><div class="line"></div><div class="line">Show all images....</div></pre></td></tr></table></figure>
</li>
<li><p>Now, let us create a file called <code>new.html</code> which will hold the form for our uploads</p>
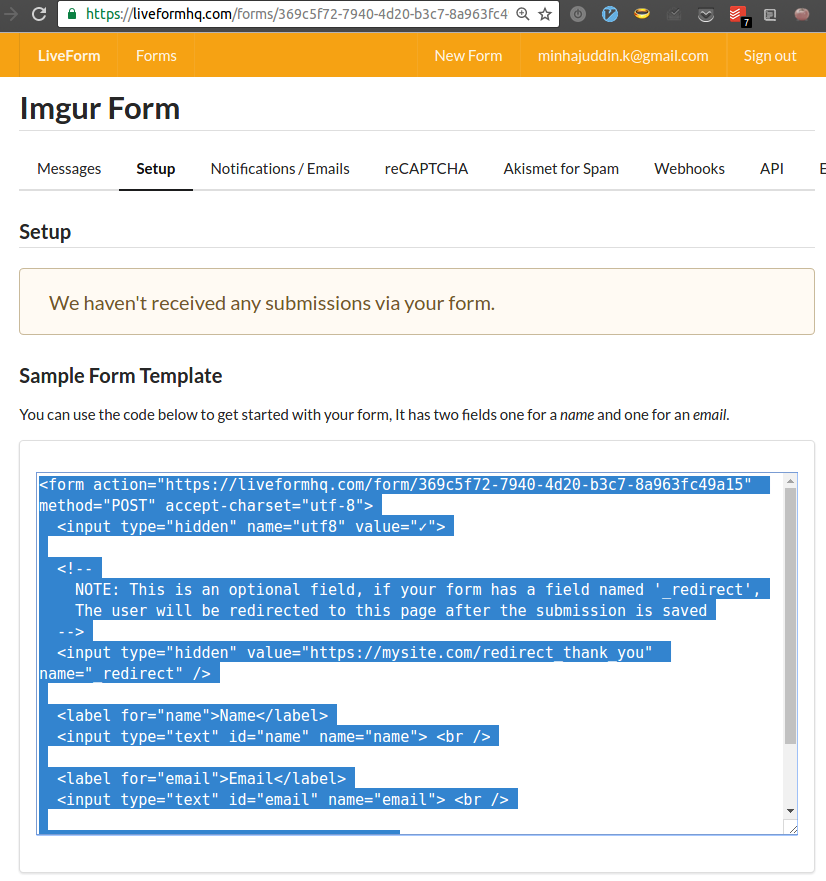
<figure class="highlight html"><table><tr><td class="gutter"><pre><div class="line">1</div><div class="line">2</div><div class="line">3</div><div class="line">4</div><div class="line">5</div><div class="line">6</div><div class="line">7</div><div class="line">8</div><div class="line">9</div><div class="line">10</div><div class="line">11</div><div class="line">12</div><div class="line">13</div><div class="line">14</div><div class="line">15</div><div class="line">16</div><div class="line">17</div><div class="line">18</div><div class="line">19</div></pre></td><td class="code"><pre><div class="line"><span class="meta">&lt;!doctype html&gt;</span></div><div class="line"></div><div class="line"><span class="tag">&lt;<span class="name">a</span> <span class="attr">href</span>=<span class="string">'/'</span>&gt;</span>Imgur<span class="tag">&lt;/<span class="name">a</span>&gt;</span> | <span class="tag">&lt;<span class="name">a</span> <span class="attr">href</span>=<span class="string">'/new.html'</span>&gt;</span>New Upload<span class="tag">&lt;/<span class="name">a</span>&gt;</span></div><div class="line"></div><div class="line"><span class="tag">&lt;<span class="name">br</span> /&gt;</span></div><div class="line"></div><div class="line"><span class="tag">&lt;<span class="name">form</span> <span class="attr">action</span>=<span class="string">"https://liveformhq.com/form/369c5f72-7940-4d20-b3c7-8a963fc49a15"</span> <span class="attr">method</span>=<span class="string">"POST"</span> <span class="attr">accept-charset</span>=<span class="string">"utf-8"</span>  <span class="attr">enctype</span>=<span class="string">"multipart/form-data"</span>&gt;</span></div><div class="line">  <span class="tag">&lt;<span class="name">input</span> <span class="attr">type</span>=<span class="string">"hidden"</span> <span class="attr">name</span>=<span class="string">"utf8"</span> <span class="attr">value</span>=<span class="string">"✓"</span>&gt;</span></div><div class="line"></div><div class="line">  <span class="tag">&lt;<span class="name">input</span> <span class="attr">type</span>=<span class="string">"hidden"</span> <span class="attr">value</span>=<span class="string">"https://minhajuddin.github.io/imgur_clone/"</span> <span class="attr">name</span>=<span class="string">"_redirect"</span> /&gt;</span></div><div class="line"></div><div class="line">  <span class="tag">&lt;<span class="name">label</span> <span class="attr">for</span>=<span class="string">"title"</span>&gt;</span>Title<span class="tag">&lt;/<span class="name">label</span>&gt;</span></div><div class="line">  <span class="tag">&lt;<span class="name">input</span> <span class="attr">type</span>=<span class="string">"text"</span> <span class="attr">id</span>=<span class="string">"title"</span> <span class="attr">name</span>=<span class="string">"title"</span>&gt;</span> <span class="tag">&lt;<span class="name">br</span> /&gt;</span></div><div class="line"></div><div class="line">  <span class="tag">&lt;<span class="name">label</span> <span class="attr">for</span>=<span class="string">"upload"</span>&gt;</span>Upload<span class="tag">&lt;/<span class="name">label</span>&gt;</span></div><div class="line">  <span class="tag">&lt;<span class="name">input</span> <span class="attr">type</span>=<span class="string">"file"</span> <span class="attr">id</span>=<span class="string">"upload"</span> <span class="attr">name</span>=<span class="string">"upload"</span>&gt;</span> <span class="tag">&lt;<span class="name">br</span> /&gt;</span></div><div class="line"></div><div class="line">  <span class="tag">&lt;<span class="name">button</span> <span class="attr">type</span>=<span class="string">"submit"</span>&gt;</span>Upload<span class="tag">&lt;/<span class="name">button</span>&gt;</span></div><div class="line"><span class="tag">&lt;/<span class="name">form</span>&gt;</span></div></pre></td></tr></table></figure>
<p>A few things to note here
   a. We copied the form from the Liveform setup page</p>
<img src="/2016/11/27/creating-an-imgur-clone-using-github-pages-and-liveform/imgur4.png" alt="Liveform setup starter code" title="Liveform setup starter code">
<p>   b. We added an extra attribute to the form: <code>enctype=&quot;multipart/form-data&quot;</code>
   c. We added two input fields, one for the title and another of type <code>file</code> for the file upload
   d. We set a hidden field called <code>__redirect</code> to redirect the user back to the home page</p>
</li>
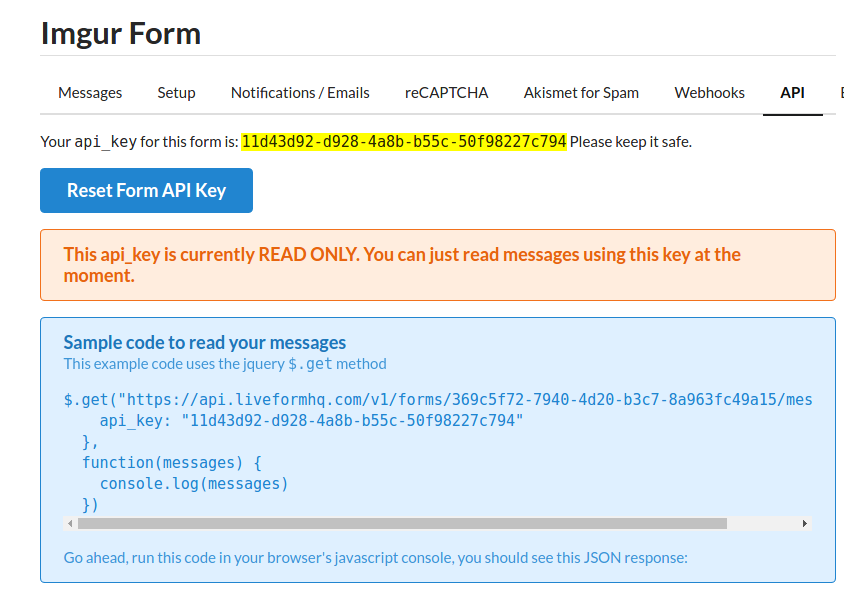
<li><p>The upload form should be all setup now. Let’s flesh out our home page. We want the user to be able to view all the uploads as soon as he visits the home page. We can easily do this using the Liveform API.</p>
<img src="/2016/11/27/creating-an-imgur-clone-using-github-pages-and-liveform/imgur5.png" alt="Liveform ajax starter code" title="Liveform ajax starter code">
<p>   The code below is straightforward.
a. We are fetching our messages using the Liveform api.
b. With these messages we are building some html for each post
c. We are also building the pagination footer using the <code>meta</code> info in the response
d. Finally we are sticking this into the <code>#container</code> div.</p>
<figure class="highlight html"><table><tr><td class="gutter"><pre><div class="line">1</div><div class="line">2</div><div class="line">3</div><div class="line">4</div><div class="line">5</div><div class="line">6</div><div class="line">7</div><div class="line">8</div><div class="line">9</div><div class="line">10</div><div class="line">11</div><div class="line">12</div><div class="line">13</div><div class="line">14</div><div class="line">15</div><div class="line">16</div><div class="line">17</div><div class="line">18</div><div class="line">19</div><div class="line">20</div><div class="line">21</div><div class="line">22</div><div class="line">23</div><div class="line">24</div><div class="line">25</div><div class="line">26</div><div class="line">27</div><div class="line">28</div><div class="line">29</div><div class="line">30</div><div class="line">31</div><div class="line">32</div><div class="line">33</div><div class="line">34</div><div class="line">35</div><div class="line">36</div><div class="line">37</div><div class="line">38</div><div class="line">39</div><div class="line">40</div><div class="line">41</div><div class="line">42</div><div class="line">43</div><div class="line">44</div><div class="line">45</div><div class="line">46</div><div class="line">47</div><div class="line">48</div><div class="line">49</div><div class="line">50</div></pre></td><td class="code"><pre><div class="line"><span class="meta">&lt;!doctype html&gt;</span></div><div class="line"></div><div class="line"><span class="tag">&lt;<span class="name">a</span> <span class="attr">href</span>=<span class="string">'/'</span>&gt;</span>Imgur<span class="tag">&lt;/<span class="name">a</span>&gt;</span> | <span class="tag">&lt;<span class="name">a</span> <span class="attr">href</span>=<span class="string">'/new.html'</span>&gt;</span>New Upload<span class="tag">&lt;/<span class="name">a</span>&gt;</span></div><div class="line"></div><div class="line"><span class="tag">&lt;<span class="name">h2</span>&gt;</span>All Images<span class="tag">&lt;/<span class="name">h2</span>&gt;</span></div><div class="line"></div><div class="line"><span class="tag">&lt;<span class="name">div</span> <span class="attr">id</span>=<span class="string">"container"</span>&gt;</span></div><div class="line">  Loading...</div><div class="line"><span class="tag">&lt;/<span class="name">div</span>&gt;</span></div><div class="line"></div><div class="line"><span class="tag">&lt;<span class="name">script</span> <span class="attr">src</span>=<span class="string">"https://code.jquery.com/jquery-3.1.1.min.js"</span> <span class="attr">type</span>=<span class="string">"text/javascript"</span> <span class="attr">charset</span>=<span class="string">"utf-8"</span>&gt;</span><span class="undefined"></span><span class="tag">&lt;/<span class="name">script</span>&gt;</span></div><div class="line"><span class="tag">&lt;<span class="name">script</span> <span class="attr">type</span>=<span class="string">"text/javascript"</span> <span class="attr">charset</span>=<span class="string">"utf-8"</span>&gt;</span><span class="undefined"></span></div><div class="line">  $(function()&#123;</div><div class="line">    $.get("https://api.liveformhq.com/v1/forms/369c5f72-7940-4d20-b3c7-8a963fc49a15/messages", &#123;</div><div class="line">        api_key: "11d43d92-d928-4a8b-b55c-50f98227c794"</div><div class="line">      &#125;,</div><div class="line">      function(response) &#123;</div><div class="line">        var body = "",</div><div class="line">          messages = response.messages;</div><div class="line">        for(var i=0; i &lt; messages.length; i++)&#123;</div><div class="line">          body += imageTemplate(messages[i], i + 1)</div><div class="line">        &#125;</div><div class="line"></div><div class="line">        body += pagnationTemplate(response);</div><div class="line"></div><div class="line">        $("#container").html(body)</div><div class="line">      &#125;)</div><div class="line">  &#125;)</div><div class="line"></div><div class="line">  function pagnationTemplate(response)&#123;</div><div class="line">    var meta = response.meta;</div><div class="line">    return  "&lt;div&gt;" +</div><div class="line">      "&lt;h4&gt; Showing " + response.messages.length  + " records out of " + meta.total_count + ", page " + meta.current_page + " of " + meta.total_pages + " &lt;/h4&gt;" +</div><div class="line">      "&lt;div&gt;"+(meta.next_link ? "&lt;a href='"+meta.next_link+"'&gt;Next&lt;/a&gt;" : "" ) + "|" + (meta.prev_link ? "&lt;a href='"+meta.prev_link+"'&gt;Prev&lt;/a&gt;" : "")  +"&lt;/div&gt;" +</div><div class="line">            "&lt;/div&gt;";</div><div class="line">  &#125;</div><div class="line"></div><div class="line">  function imageTemplate(message, id)&#123;</div><div class="line">    if (!message.data.upload) &#123;</div><div class="line">      return "";</div><div class="line">    &#125;</div><div class="line"></div><div class="line">    var title = (message.data.title || "Untitled");</div><div class="line"></div><div class="line">    return "&lt;div class='post'&gt;" +</div><div class="line">        "&lt;h2&gt;" + id + "." + title + "&lt;/h2&gt;" +</div><div class="line">        "&lt;div class=image&gt;&lt;img alt='" + title + "' style='max-width: 100%;' src='" + message.data.upload + "' /&gt;&lt;/div&gt;" +</div><div class="line">        "&lt;/div&gt;"</div><div class="line">  &#125;</div><div class="line"><span class="tag">&lt;/<span class="name">script</span>&gt;</span></div></pre></td></tr></table></figure>
</li>
</ol>
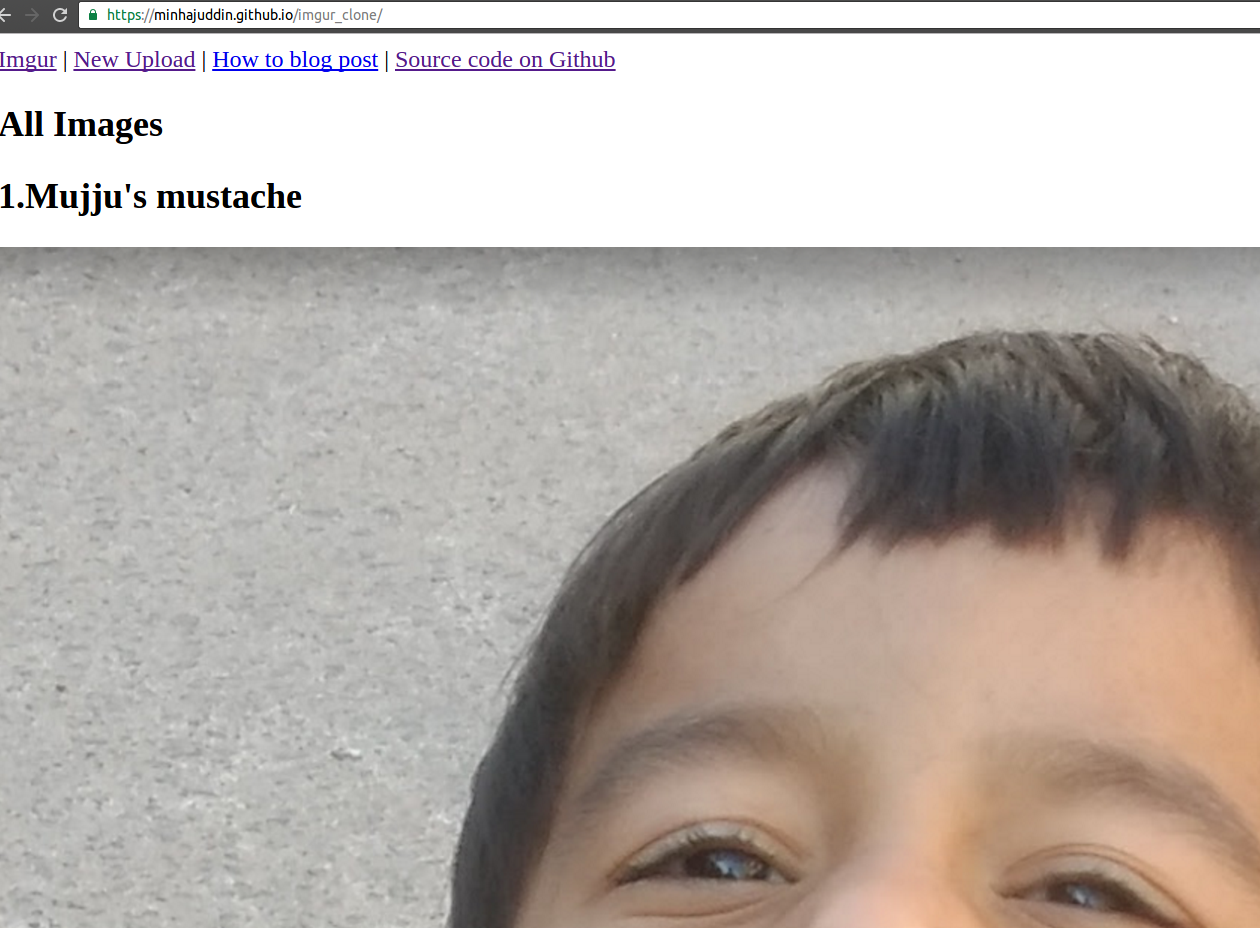
<p><strong> Here is the final screenshot of the website </strong>
<img src="/2016/11/27/creating-an-imgur-clone-using-github-pages-and-liveform/imgur6.png" alt="Imgur clone screenshot" title="Imgur clone screenshot"></p>
<p>Obviously this is not the same as Imgur :) But you get the idea ;)</p>
<p>Oh, and here is a link to the final Github Pages website: <a href="https://minhajuddin.github.io/imgur_clone/" target="_blank" rel="external">https://minhajuddin.github.io/imgur_clone/</a></p>
]]></content>
    
    <summary type="html">
    
      &lt;p&gt;&lt;a href=&quot;http://blog.liveformhq.com/2016/11/26/file-uploads-for-your-forms/&quot;&gt;Yesterday, we released the ability to upload files using Liv
    
    </summary>
    
    
      <category term="Image uploads" scheme="http://blog.liveformhq.com/tags/image-uploads/"/>
    
      <category term="Imgur clone" scheme="http://blog.liveformhq.com/tags/imgur-clone/"/>
    
      <category term="API" scheme="http://blog.liveformhq.com/tags/api/"/>
    
  </entry>
  
  <entry>
    <title>File uploads for your forms</title>
    <link href="http://blog.liveformhq.com/2016/11/26/file-uploads-for-your-forms/"/>
    <id>http://blog.liveformhq.com/2016/11/26/file-uploads-for-your-forms/</id>
    <published>2016-11-26T19:35:49.000Z</published>
    <updated>2017-10-17T12:52:49.000Z</updated>
    
    <content type="html"><![CDATA[<p>You can now do file uploads using Liveform. You just need two things to be able
to upload files.</p>
<ol>
<li>Make sure your form has an attribute <code>enctype=&quot;multipart/form-data&quot;</code></li>
<li>Add a file field e.g. <code>&lt;input type=file name=resume /&gt;</code></li>
</ol>
<p>That’s it, once you have those, files can be uploaded through your forms.</p>
]]></content>
    
    <summary type="html">
    
      &lt;p&gt;You can now do file uploads using Liveform. You just need two things to be able
to upload files.&lt;/p&gt;
&lt;ol&gt;
&lt;li&gt;Make sure your form has an 
    
    </summary>
    
    
      <category term="File upload" scheme="http://blog.liveformhq.com/tags/file-upload/"/>
    
      <category term="Contact Form" scheme="http://blog.liveformhq.com/tags/contact-form/"/>
    
  </entry>
  
  <entry>
    <title>Our first version is live!</title>
    <link href="http://blog.liveformhq.com/2016/10/07/our-first-version-is-live/"/>
    <id>http://blog.liveformhq.com/2016/10/07/our-first-version-is-live/</id>
    <published>2016-10-07T23:32:37.000Z</published>
    <updated>2017-10-17T12:52:49.000Z</updated>
    
    <content type="html"><![CDATA[<p>Our first version of LiveForm is live!</p>
<p>We hope you guys find it useful :)</p>
<p>You can read more about how to use LiveForm by checking out the <a href="http://docs.liveformhq.com/" target="_blank" rel="external">documentation at http://docs.liveformhq.com/</a>.
The tl;dr; version of it is: Use LiveForm for all your online forms without the need for iframes!</p>
<p>So, go ahead and <a href="https://liveformhq.com/registrations/new?plan=starter" target="_blank" rel="external">sign up now!</a></p>
]]></content>
    
    <summary type="html">
    
      &lt;p&gt;Our first version of LiveForm is live!&lt;/p&gt;
&lt;p&gt;We hope you guys find it useful :)&lt;/p&gt;
&lt;p&gt;You can read more about how to use LiveForm by ch
    
    </summary>
    
    
      <category term="V1" scheme="http://blog.liveformhq.com/tags/v1/"/>
    
      <category term="Live" scheme="http://blog.liveformhq.com/tags/live/"/>
    
  </entry>
  
  <entry>
    <title>Hello World</title>
    <link href="http://blog.liveformhq.com/2016/10/07/hello-world/"/>
    <id>http://blog.liveformhq.com/2016/10/07/hello-world/</id>
    <published>2016-10-07T00:00:00.000Z</published>
    <updated>2017-10-17T12:52:49.000Z</updated>
    
    <content type="html"><![CDATA[<p>Welcome to the LiveForm Blog!</p>
<p>We’ll be sharing technology and related stuff used in LiveForm here.</p>
]]></content>
    
    <summary type="html">
    
      &lt;p&gt;Welcome to the LiveForm Blog!&lt;/p&gt;
&lt;p&gt;We’ll be sharing technology and related stuff used in LiveForm here.&lt;/p&gt;

    
    </summary>
    
    
  </entry>
  
</feed>